Arepa Recipe: A Venezuelan Fiesta in Your Kitchen! (English Recipe Included)
¡Hola, amigos! Get ready to embark on a culinary adventure that will transport your taste buds straight to the sunny shores of Venezuela! Today, we're diving headfirst into the world of arepas, those delightful corn cakes that are more than just food – they're a cultural icon. Forget bland bread; arepas are the vibrant, versatile stars of any meal, from breakfast to dinner, and even dessert (yes, you read that right!). This isn't just any arepa recipe; this is your passport to arepa mastery!
Decoding the Arepa: More Than Just Corn
Before we get our hands dirty (and believe me, they’ll get dirty in the best way possible!), let's talk about what makes an arepa truly arepa. It's not just about the ingredients; it's about the process, the passion, and the sheer joy of making something so simple yet so profoundly delicious.
The Magic of Maseca (and its Alternatives)
The heart of any great arepa is maseca, a pre-cooked corn flour. You can find it in most Latin American grocery stores, and trust me, the hunt is worth it. But fear not, fellow culinary adventurers! If maseca remains elusive, you can experiment with other corn flours, though the results might vary slightly. We'll explore those alternatives later.
Maseca vs. Other Corn Flours: A Quick Comparison
| Corn Flour Type | Texture | Taste | Arepa Success Rate |
|---|---|---|---|
| Maseca (Pre-cooked) | Smooth, pliable | Mildly sweet | Excellent |
| Fine Cornmeal | Slightly coarser | More pronounced corn flavor | Good (requires more liquid) |
| Coarse Cornmeal | Very coarse | Strong corn flavor | Challenging (best for a rustic arepa) |
The Arepa Recipe: A Step-by-Step Guide to Glory
Now for the moment you've all been waiting for: the recipe! This recipe yields approximately 8 medium-sized arepas.
Ingredients:
- 2 cups Maseca (or alternative corn flour)
- 2 cups warm water
- 1 teaspoon salt
- 1 tablespoon oil (vegetable or canola)
Instructions:
- Mix it up: In a large bowl, combine the maseca, salt, and oil. Gradually add the warm water, mixing with your hands until a soft, slightly sticky dough forms. Don't be afraid to get your hands in there – it's part of the fun!
- Knead it: Knead the dough for about 5-7 minutes. This is crucial for developing the gluten (yes, even corn flour has gluten!) and achieving that perfect arepa texture.
- Rest it: Cover the dough with a damp cloth and let it rest for at least 15 minutes. This allows the maseca to fully hydrate, resulting in a smoother, more pliable dough.
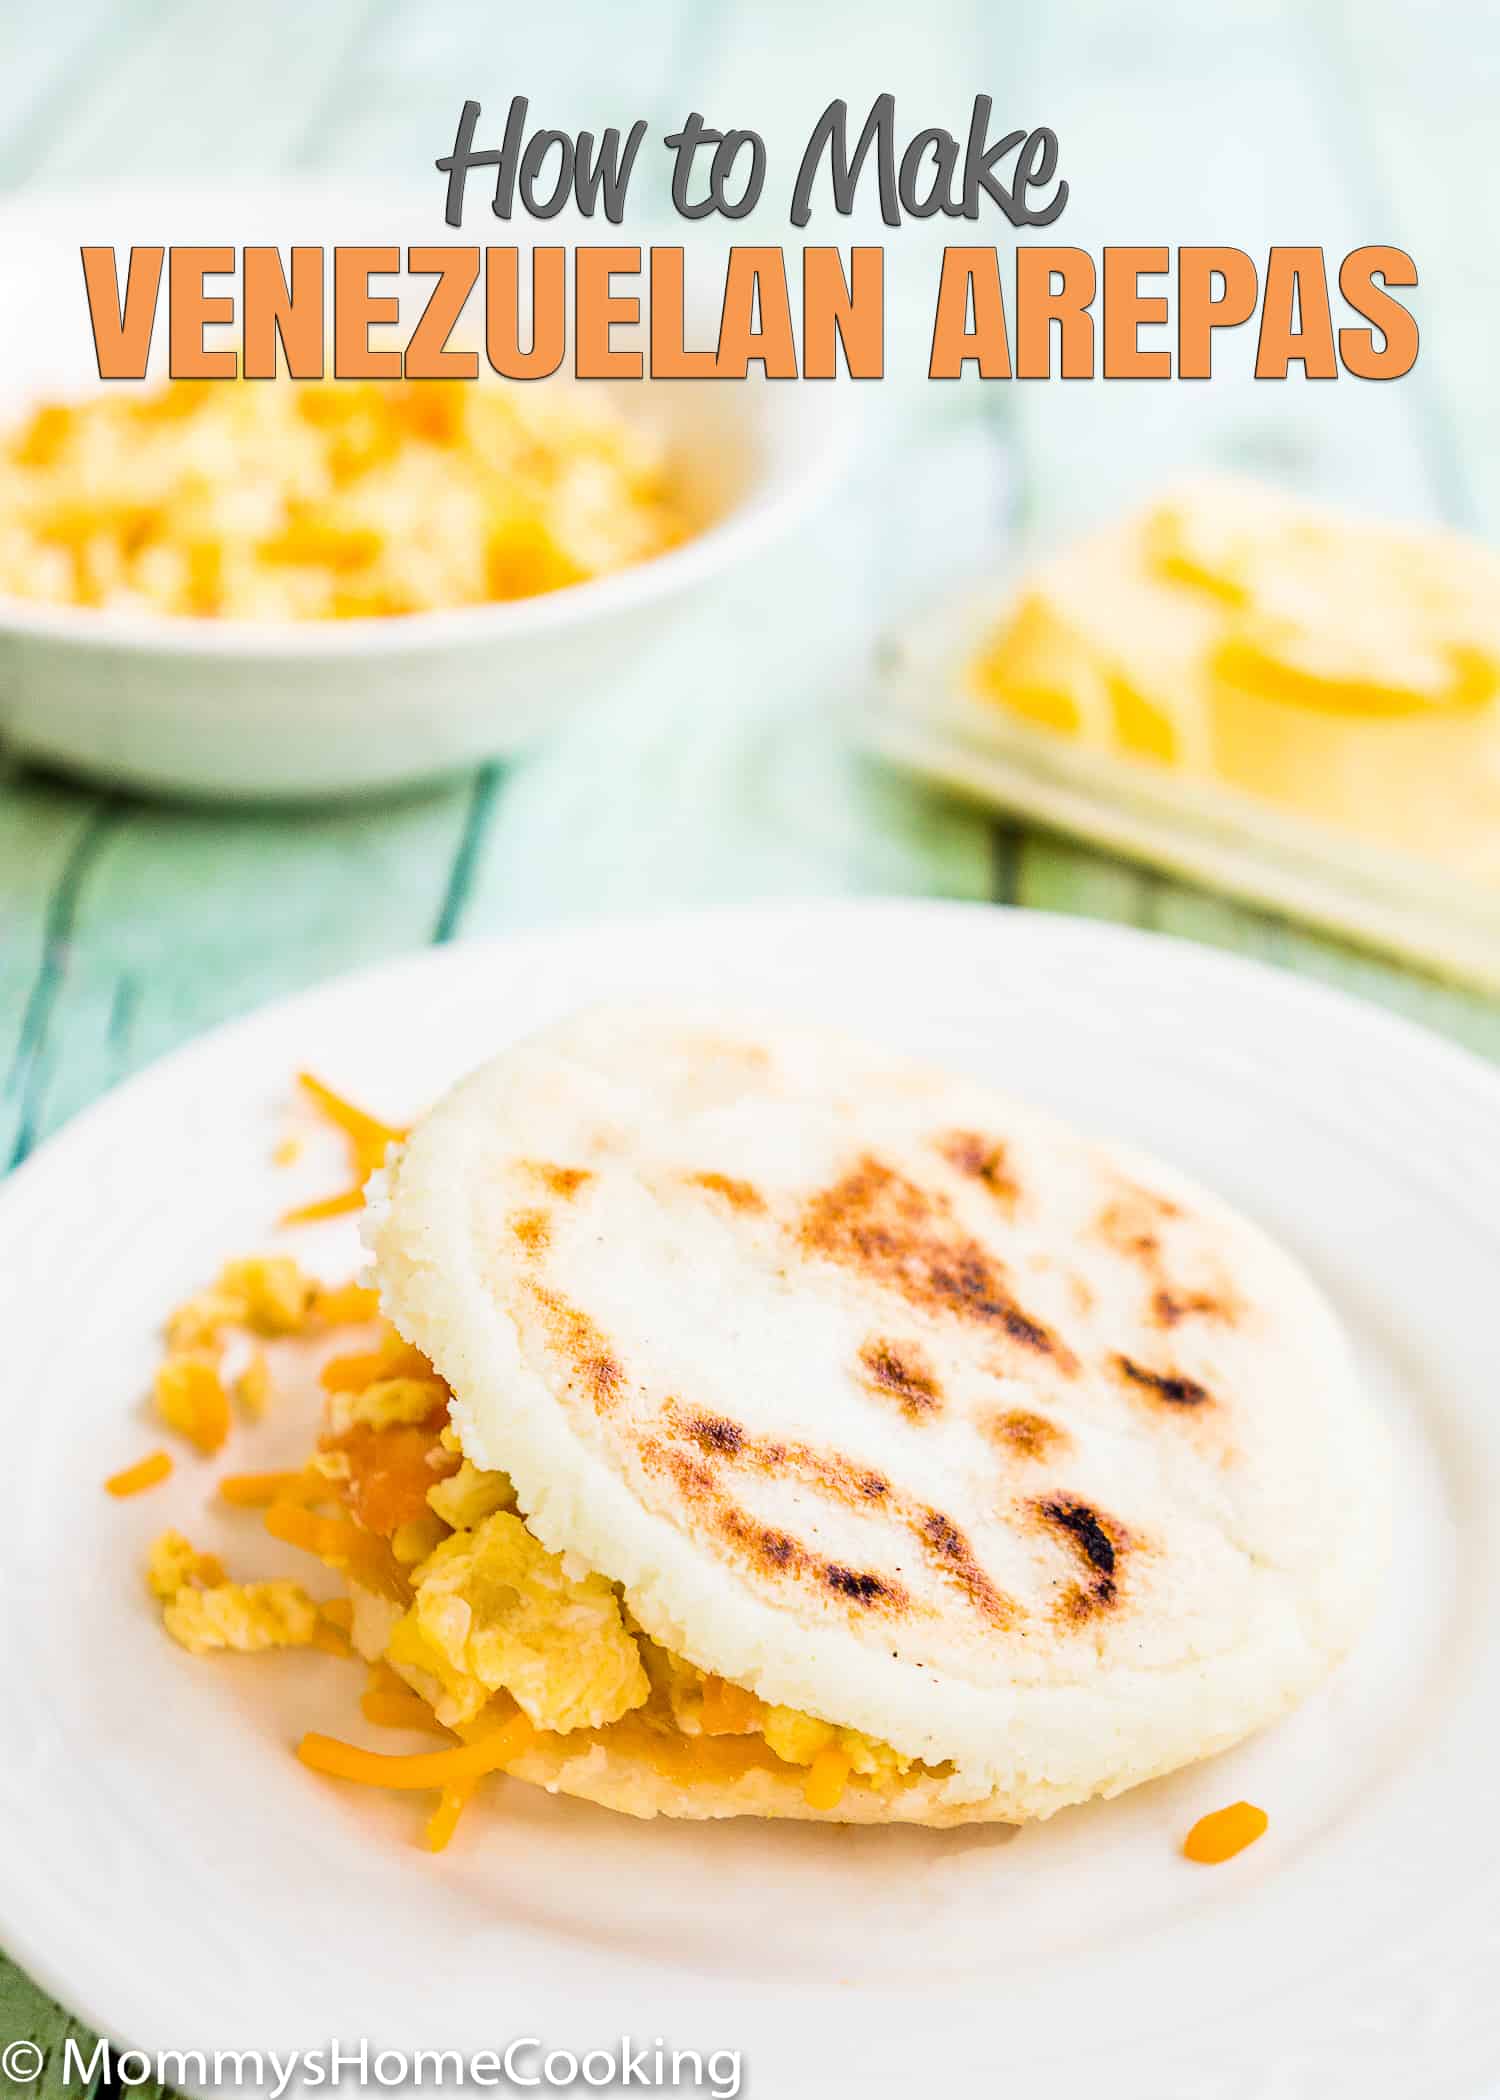
- Shape it: Divide the dough into 8 equal portions. Roll each portion into a ball, then flatten it into a disc about ½ inch thick. You can make them thicker or thinner depending on your preference.
- Cook it: Heat a large skillet or griddle over medium heat. Cook the arepas for about 3-4 minutes per side, or until golden brown and cooked through. You'll know they're ready when they sound hollow when tapped.
Arepa Filling Frenzy: Unleash Your Inner Chef!
The beauty of arepas lies in their versatility. They're the perfect canvas for a symphony of flavors. Here are a few ideas to get your creative juices flowing:
- Classic Cheese: Shredded cheese (queso fresco, mozzarella, or your favorite) is a timeless classic.
- Carnes: Shredded beef, chicken, or pork are always a hit.
- Vegetarian Delight: Black beans, avocado, and a sprinkle of cilantro make a fantastic vegetarian option.
- Sweet Surrender: Try adding some cinnamon and sugar for a sweet treat!
Troubleshooting Your Arepa Journey
Even the most seasoned chefs encounter a few bumps in the road. Here are some common problems and their solutions:
Arepas Too Dry?
Add a tablespoon or two of water at a time until you reach the desired consistency.
Arepas Too Sticky?
Add a tablespoon or two of maseca at a time until the dough is less sticky.
Arepas Cracking During Cooking?
Make sure your dough is well-kneaded and rested. Also, ensure the heat isn't too high.
Beyond the Basics: Exploring Arepa Variations
The world of arepas is vast and exciting! Let's explore some regional variations:
Arepas de Choclo: The Sweet Corn Sensation
Made with fresh, sweet corn, these arepas offer a delightful twist on the classic recipe.
A Quick Note on Sweet Corn Arepas
Remember to adjust the water accordingly, as sweet corn adds moisture to the dough.
Frequently Asked Questions (FAQs)
Q: Can I make arepas ahead of time?
A: Absolutely! Cooked arepas can be stored in the refrigerator for up to 3 days. Reheat them in a skillet or microwave.
Q: Can I freeze arepas?
A: Yes! Cooked or uncooked arepas can be frozen. Wrap them tightly in plastic wrap and then aluminum foil for best results.
Q: What kind of oil should I use?
A: Vegetable or canola oil works best.
Q: Can I use a different type of flour?
A: While maseca is ideal, you can experiment with other corn flours, but the results might vary.
Conclusion: Your Arepa Adventure Awaits!
So there you have it – your complete guide to making delicious, authentic Venezuelan arepas. Don't be afraid to experiment with different fillings and flavors. The possibilities are endless! Grab your ingredients, put on some Latin music, and get ready for a culinary adventure that will leave you wanting more. ¡Buen provecho! Enjoy your arepas!