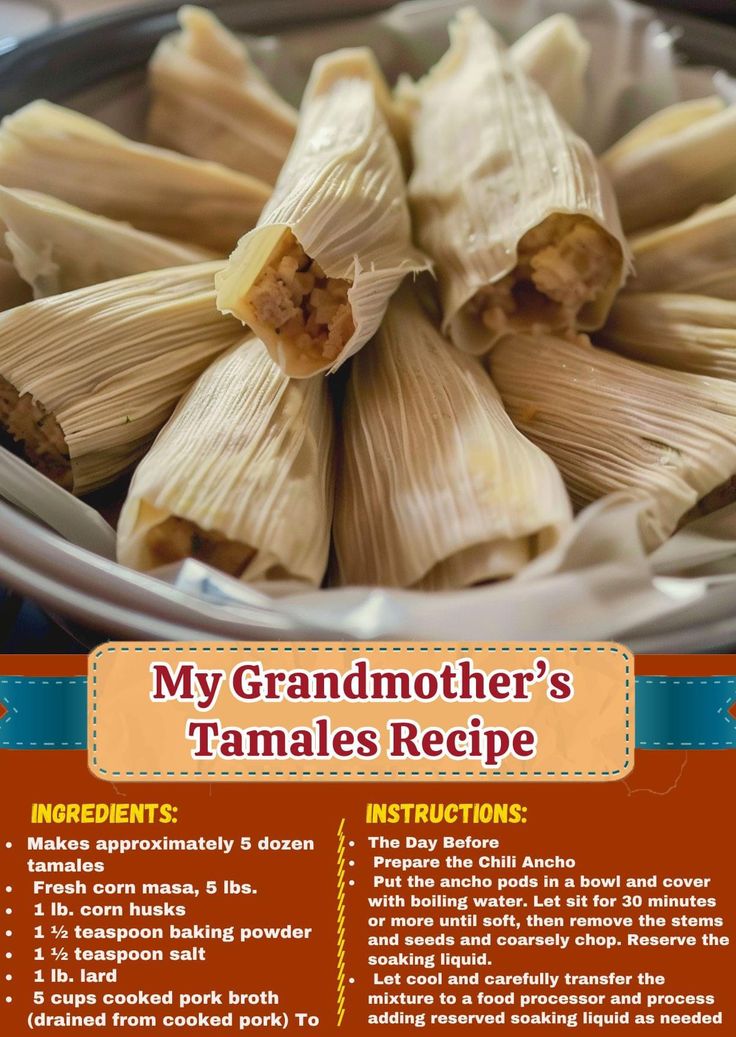
A Tamale-tastic Adventure: Your English-Language Guide to Making Delicious Tamales
¡Hola, amigos! Ready to embark on a culinary journey that will tantalize your taste buds and impress your friends and family? Forget those sad, store-bought tamales. We're diving headfirst into the art of making authentic, homemade tamales – and I'm going to guide you through the process in English, step-by-step, so even your abuela will be proud!
This isn't just a recipe; it's a fiesta in your kitchen! Prepare for a delicious adventure that will leave you wanting more...and probably covered in masa. Let's get started!
1. Gathering Your Arsenal: Ingredients and Equipment
Before we unleash the tamale magic, we need our ingredients. Think of this as assembling your culinary superhero team: each ingredient plays a crucial role in the grand tamale finale.
1.1 The Holy Trinity of Tamales: Masa, Filling, and Salsa
- Masa Harina: This is the foundation of your tamale empire. Choose a good quality brand, and don't be shy!
- Your Favorite Filling: The possibilities are endless! Think savory pork, spicy chicken tinga, cheesy vegetarian, or even sweet pineapple. The world's your oyster (or your tamale, rather).
- Salsa: No tamale experience is complete without a vibrant, flavorful salsa. Prepare a simple tomato salsa, a fiery habanero salsa, or whatever tickles your fancy.
1.2 The Supporting Cast: Essential Ingredients
- Vegetable Broth or Water: For the masa mixture.
- Lard or Vegetable Shortening: For that perfectly tender masa. (Don't worry, a little fat goes a long way!)
- Baking Powder: A pinch adds lightness and fluffiness.
- Salt: To season your masa.
- Corn Husks (or Banana Leaves): These are your tamale canvases. Soak them in warm water to make them pliable.
1.3 Kitchen Command Center: Equipment You'll Need
- Large Mixing Bowl: For mixing the masa.
- Steamer: Essential for steaming the tamales to perfection. A large pot with a steamer basket works wonders.
- Wooden Spoon or Spatula: For mixing the masa.
- Measuring Cups and Spoons: For precise measurements (essential for tamale success!).
- Sharp Knife: For chopping your filling ingredients.
2. Preparing the Masa: The Heart of the Matter
This is where the magic happens. The masa is the heart and soul of your tamale, so take your time and make sure it's just right.
2.1 The Masa Mix Masterclass
- Mix the Dry Ingredients: In your large bowl, combine the masa harina, baking powder, and salt.
- Add the Wet Ingredients: Gradually add your warm broth or water, mixing constantly with your wooden spoon or spatula. The consistency should be like thick, creamy oatmeal. It shouldn't be runny, but it shouldn't be so stiff that it's impossible to spread.
- Incorporate the Fat: Add your lard or shortening and continue mixing until it's fully incorporated. This will give your tamales that melt-in-your-mouth texture.
3. Assembling Your Tamale Masterpieces
Now for the fun part! This is where your creativity shines.
3.1 Layering the Love: The Tamale Assembly Line
- Prepare Your Husks: Lay a corn husk flat.
- Spread the Masa: Spread a thin layer of masa onto the husk, leaving about an inch of space at the top and bottom.
- Add the Filling: Place a spoonful of your chosen filling in the center of the masa.
- Fold and Roll: Fold the sides of the husk inward, then roll it up tightly. The masa should completely enclose the filling.
4. Steaming to Perfection: The Grand Finale
The steaming process is crucial for achieving perfectly cooked, tender tamales.
4.1 Steaming Secrets: Tips for Tamale Triumph
- Layer the Tamales: Place the assembled tamales in your steamer, standing them upright.
- Add Water: Make sure there's enough water in the bottom of the steamer to create steam.
- Steam Time: Steam for approximately 1-1.5 hours, or until the masa is easily peeled away from the husk. Check for doneness by gently pulling back a husk; the masa should be firm and cooked through.
5. Serving and Enjoying Your Culinary Creation
Congratulations! You've successfully created a batch of delicious homemade tamales.
5.1 Tamale Presentation: A Feast for the Eyes
Arrange your steaming hot tamales on a platter, and garnish with your favorite salsa and toppings.
6. Beyond the Basics: Exploring Tamale Variations
The beauty of tamales lies in their versatility. Experiment with different fillings and flavors!
6.1 Sweet Tamales: A Delightful Departure
Try sweet fillings like pineapple, raisins, or even chocolate!
7. Troubleshooting Common Tamale Challenges
Don't worry, even experienced tamale makers encounter hiccups.
7.1 Masa Mishaps: Solving Common Problems
- Masa too dry: Add a little more water.
- Masa too wet: Add a little more masa harina.
8. FAQs: Your Tamale Questions Answered
Q: Can I freeze tamales? A: Absolutely! Freeze them before or after steaming.
Q: How long do tamales last? A: Refrigerated tamales last for about 3-4 days. Frozen tamales can last for several months.
Q: Can I use different types of husks? A: Yes, banana leaves are a popular alternative.
Q: What if my tamales fall apart? A: Make sure your masa is the right consistency and that you're wrapping them tightly.
9. Tips and Tricks from a Tamale Pro
- Soak your husks for at least 30 minutes.
- Don't overfill your tamales.
- Use a steamer that allows for even steam distribution.
10. Conclusion: Your Tamale Journey Begins Now!
So there you have it – your comprehensive guide to making delicious homemade tamales. Don't be intimidated by the process; embrace the adventure! With a little patience and practice, you'll be crafting tamale masterpieces in no time. ¡Buen provecho! And remember, the best tamales are the ones made with love (and maybe a little bit of lard).